Easy Postman and Azure FHIR Setup

Table of Contents
Overview
Postman is super useful for testing API calls to the FHIR Service in Azure Health Data Services or the Azure API for FHIR. One common annoyance is I’ve always had to create an Application Registration in Azure Active Directory to access my FHIR Service through either the client credentials flow or the authorization code flow. Well, you don’t need any configuration changes in AAD for simple test queries.
Postman Setup
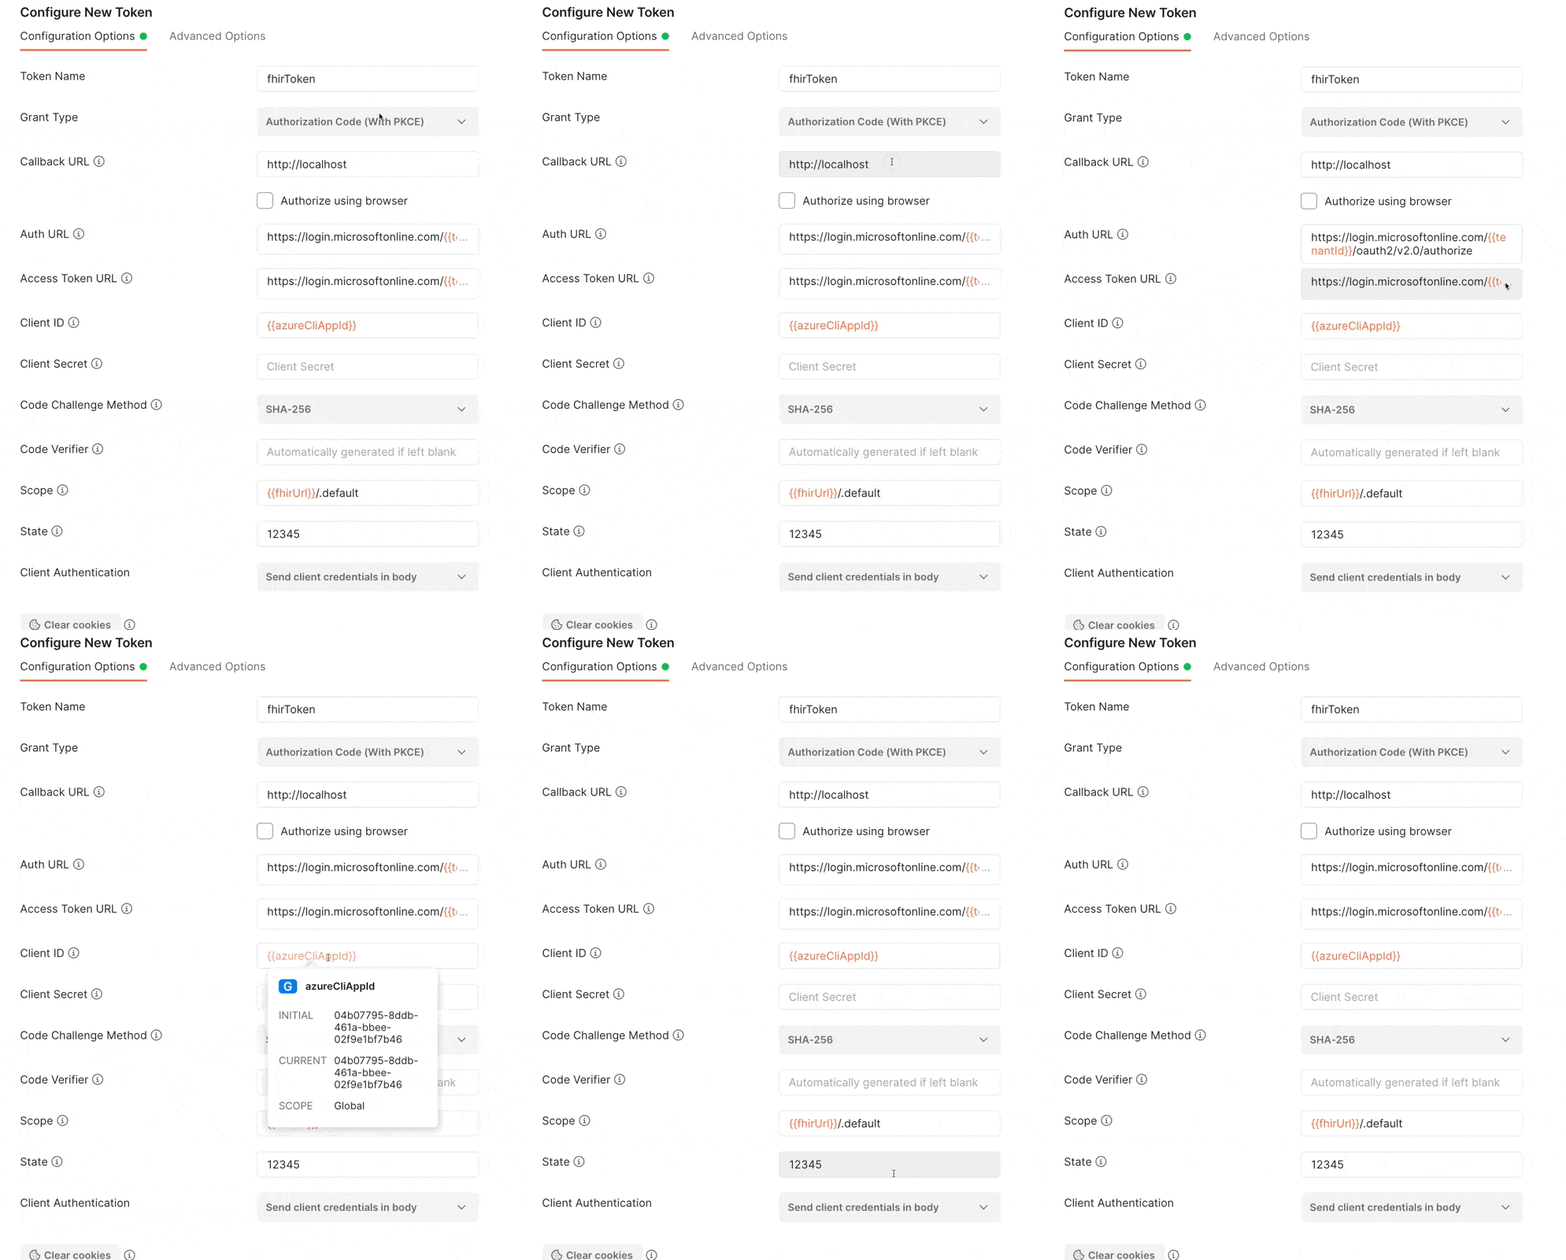
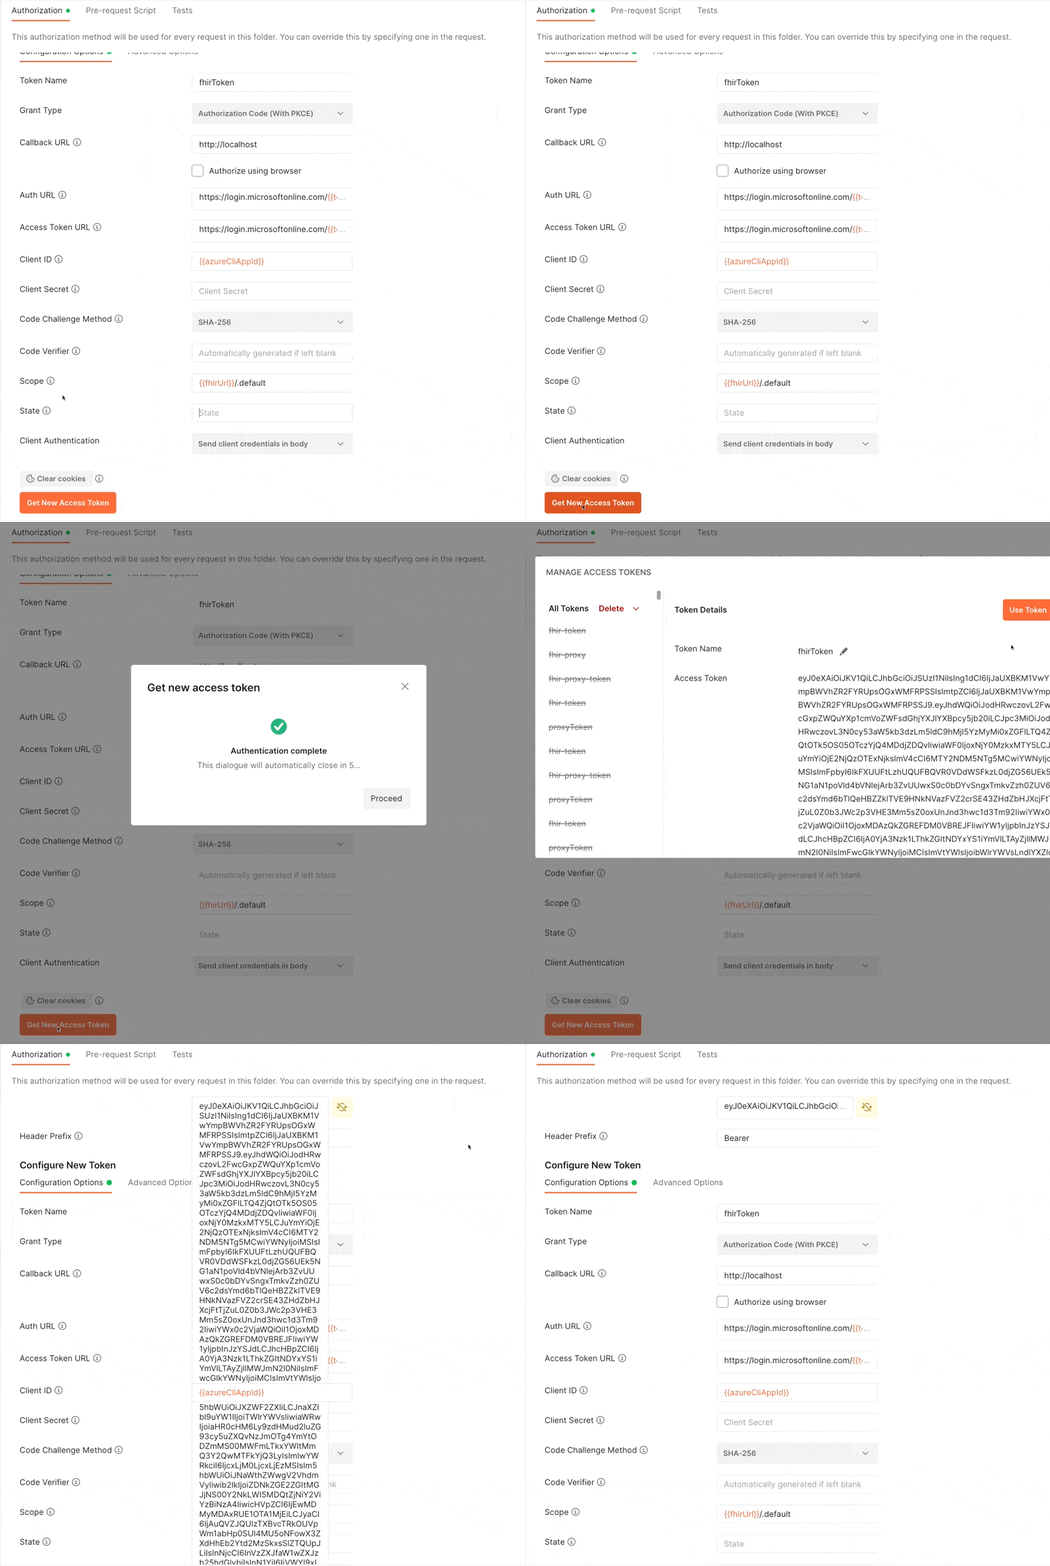
In Postman, go to the “Authorization” tab for your request or folder. Configure a new token and add the below configuration values.
- Callback URL:
http://localhost - Authorize using browser: Unchecked
- Auth URL:
https://login.microsoftonline.com/{{tenantId}}/oauth2/v2.0/authorize - Access Token URL:
https://login.microsoftonline.com/{{tenantId}}/oauth2/v2.0/token - Client ID:
04b07795-8ddb-461a-bbee-02f9e1bf7b46 - Scope:
{{fhirUrl}/.default
The above is assuming you have the following variables set:
tenantId: Your Azure Active Directory Tenant ID (like )fhirUrl: The base URL for your FHIR Service (likehttps://workspace-service.fhir.azurehealthcareapis.com/)

Now click the “Get New Access Token” button. This will initiate the login process in a popup window. Once you are logged in, the token will be displayed to you and you can use this token!

How Does It Work?
This works seamlessly by using the existing application id from the Azure CLI. Instead of registering a new application, we can piggyback off of Azure CLI, which already exists in every Azure tenant. This is not something I would have thought of, but I found the Azure SDK for .NET is doing this to support the InteractiveBrowserCredential Class in Azure.Identity.
azure-sdk-for-net/sdk/identity/Azure.Identity/src/Credentials/InteractiveBrowserCredential.cs
| |
azure-sdk-for-net/sdk/identity/Azure.Identity/src/Constants.cs
| |
Disclaimer - While I work at Microsoft on the FHIR Team, this isn’t a Microsoft sanctioned approach.